
Clientflow Platform Updates: 28 September - 11 October 2026
Twelve features landed across this fortnight, and three of them make AI Studio a far more complete way to build a client portal, booking app or website. Apps can now take payments through your existing products and checkout, a built-in backend handles sign-ins, data and file storage, and every published site reports its own visits and enquiries. For property services businesses booking recurring work, notifications for repeat appointments have also been tidied up, so clients get one confirmation for the whole series instead of one for every visit. Here is everything from 28 September to 11 October.
AI Studio
AI Studio builds websites and web apps from a description. If it is not yet switched on for your team, ask your usual contact on the Clientflow team.
AI Studio apps can now take payments
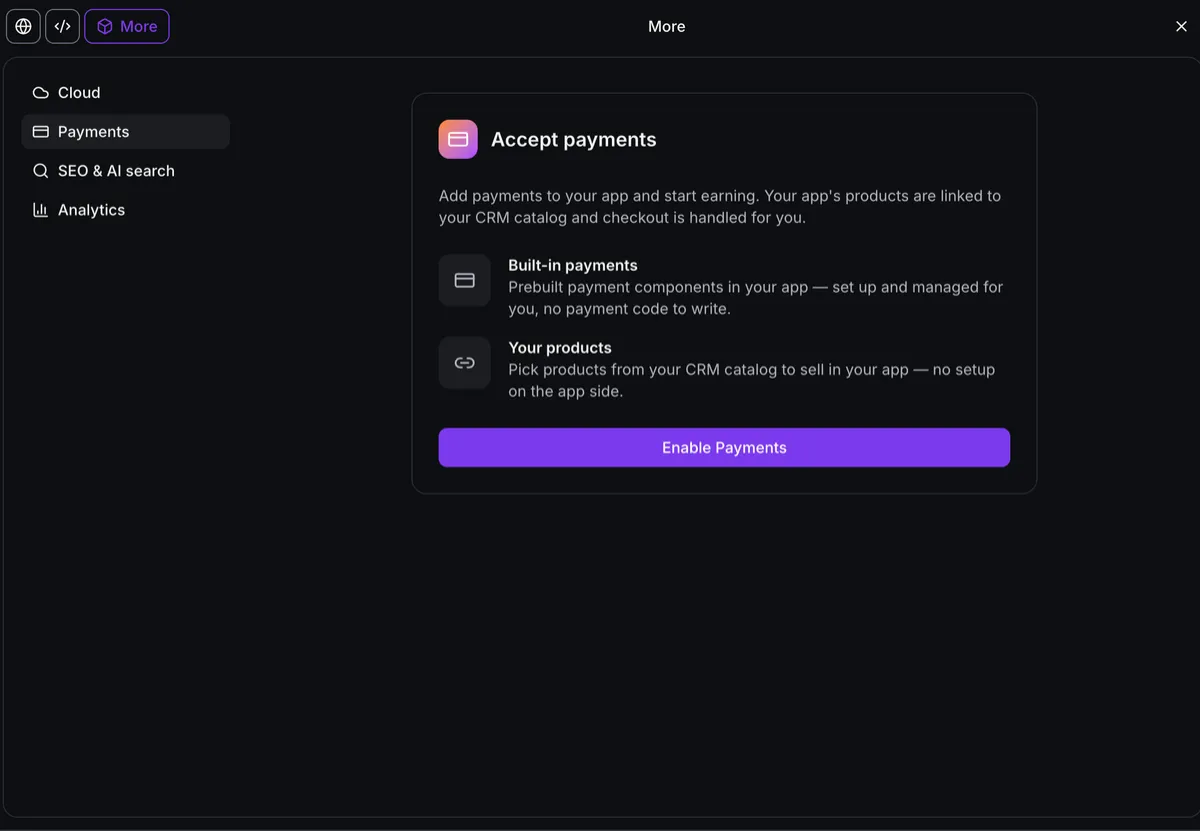
AI Studio apps can now take payments directly. Choose which catalogue products the app can sell in its Payments tab, then ask the agent to add payments, and it builds a secure hosted checkout using the payment providers, orders and subscriptions already configured in your account. Each product can be sold at one fixed price, a selected set of variations such as sizes or tiers, or its full range of price options, and only the products and prices you allow can be charged. After purchase the app can show an upsell offer, with one-click payment on saved cards through Stripe, Square and other supported providers. Card details are entered on a hosted checkout page rather than in the app itself. It is currently available only on apps built with TanStack Start, so an older project needs to move across first through Migrate to SSR in Project Settings, the migration path covered in the 14-27 September roundup. For a property services business building a client portal or quoting app, deposits and service packages can now be sold without wiring up a separate payment system. More detail
AI Studio Cloud adds a built-in backend
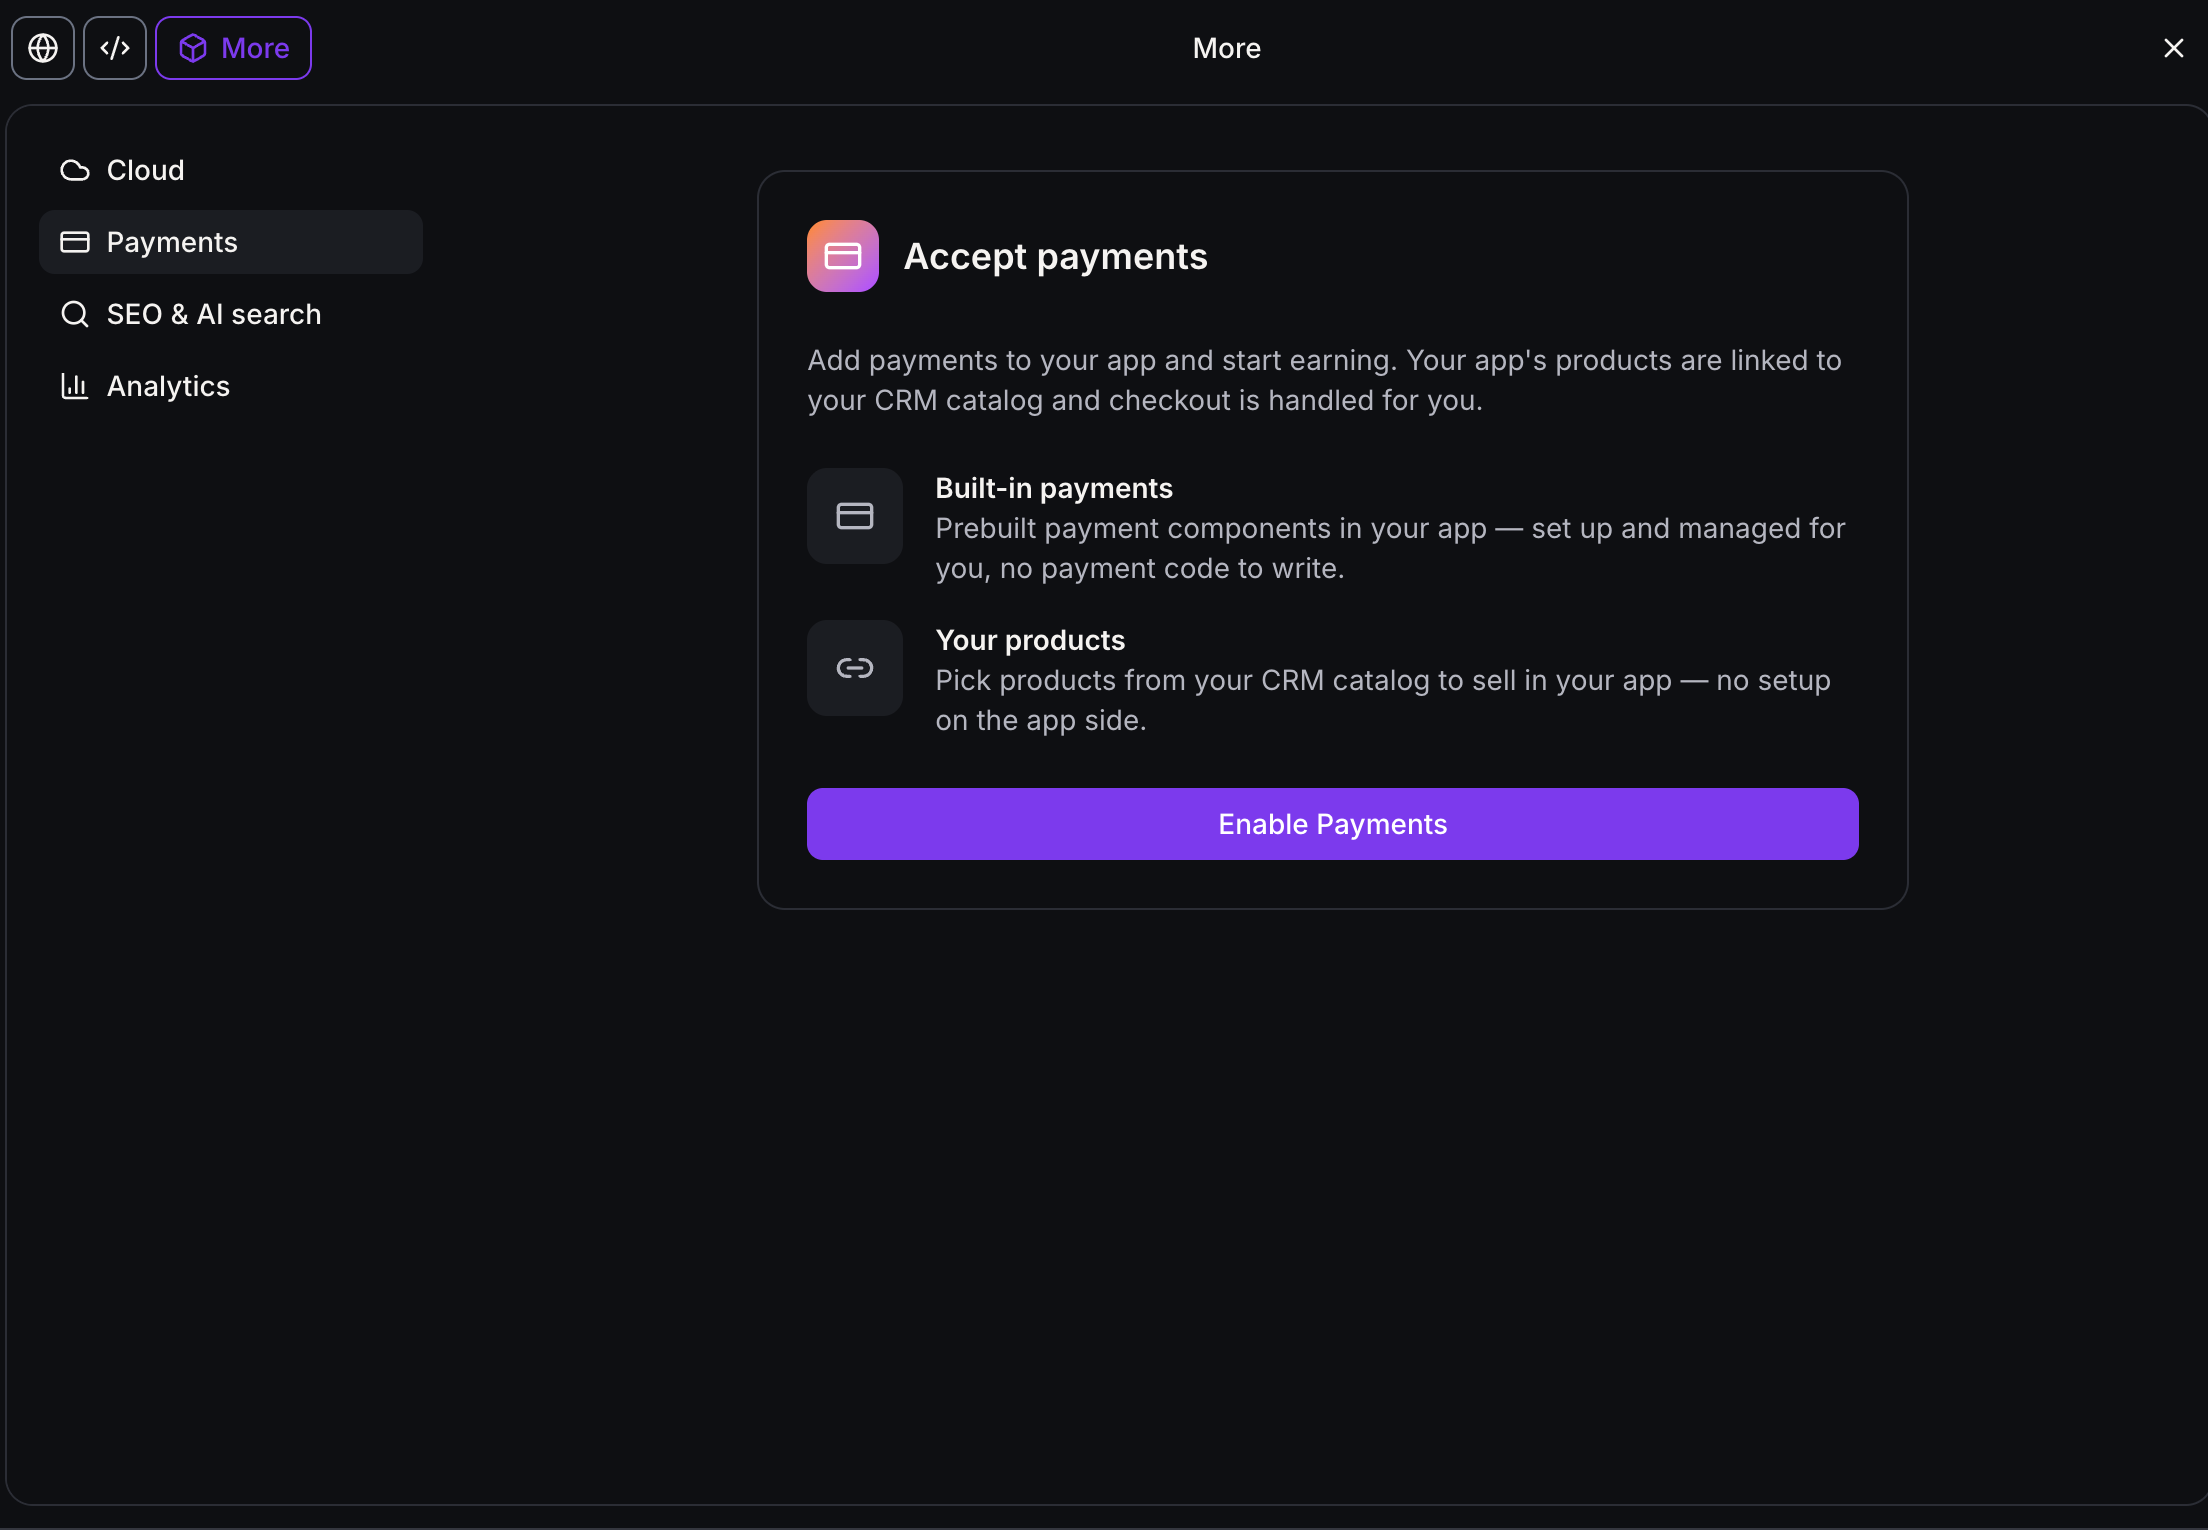
AI Studio Cloud gives apps a built-in backend, so they can remember data, manage user sign-ins and store uploaded files without connecting a separate service. Turn it on under More, then Cloud, from the Overview tab, and the platform sets up a private database, user accounts and file storage in about a minute. The database panel lets you view and edit tables directly, daily backups are included, and a security advisor flags issues before you publish. Cloud starts on a free Tiny database, and larger database sizes, reserved storage and stored files are billed by usage. Storage buckets can be public or private, with upload limits and access rules you set. For now Cloud supports email and password sign-in only, and like payments it works only with apps built on TanStack Start, so an older project needs migrating first. For a client portal or booking app built in AI Studio, logins and file storage now come built in rather than needing a separate setup. More detail
AI Studio sites now report their own analytics
Every site published through AI Studio now measures itself automatically. Page views, opt-ins and opt-in rate are available inside the project, along with traffic sources, devices and location. All AI Studio sites can also be compared side by side in Sites Analytics, alongside Funnels and Websites, and every form submission links through to the contact record together with the visitor’s full path before they enquired. No tracking code or setup is required. Forms connected before this update keep counting submissions, but to link a lead back to the pages they viewed first, ask AI Studio to reconnect form tracking and then publish the site again. For a property services business, this shows which pages and channels are turning visitors into enquiries without adding a separate analytics tool. More detail
Bookings and invoicing
One confirmation for a whole series of recurring appointments
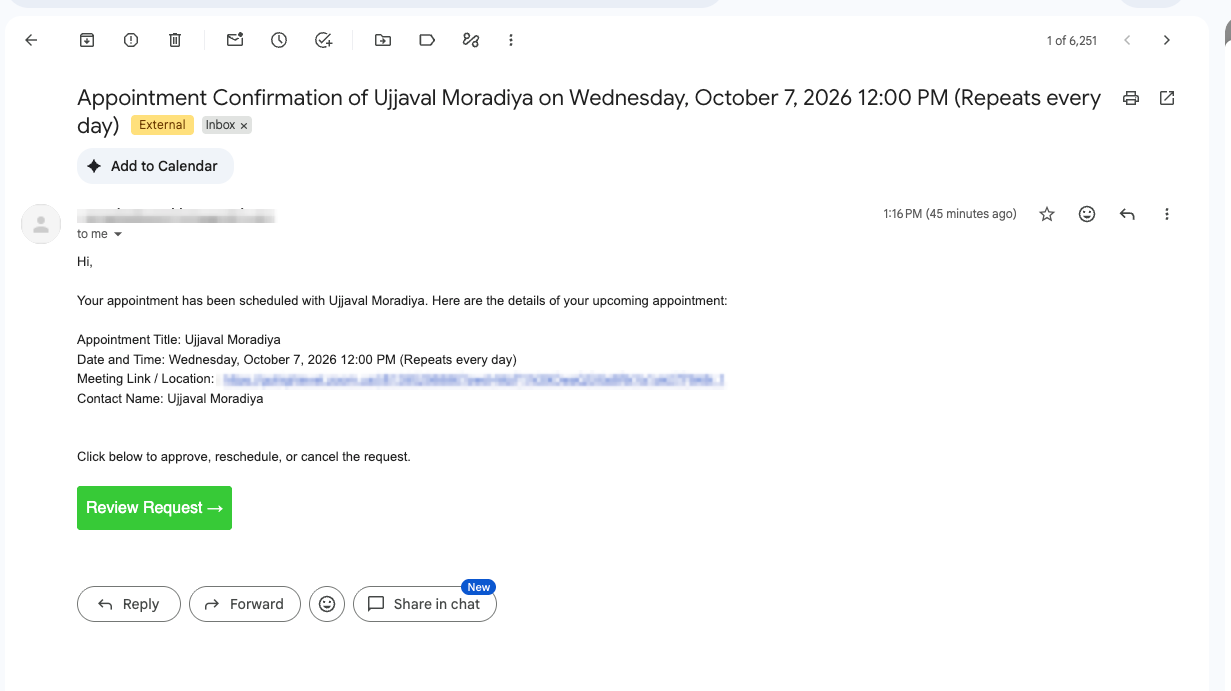
Calendar notifications for recurring appointments now behave the same way for default and custom recurrence patterns. Confirmations go out once per booking, covering the whole series. Previously, default recurring bookings sent one for every occurrence, and custom recurring appointments created inside the platform sent none at all. Reminders and follow-ups are still scheduled for each visit, and they now apply to custom recurring appointments too. For custom recurrences, reschedule and cancellation notices follow the option chosen when the change is made: This appointment sends one for that single visit, All appointments sends one for the whole series, and This and following sends one for a reschedule. Notices for default recurrences are unchanged and stay specific to the affected visit. Custom recurrence notifications can also show the pattern beside the date and time, such as “reoccurs every Thursday”, as long as the template includes the appointment date and time custom value. It applies automatically to newly booked and edited appointments, and covers calendar notifications only, not workflows. For recurring work such as fortnightly lawn care or regular pest treatments, clients get one clear confirmation for the whole run instead of a stack of near-identical messages. More detail
Design your own invoice layouts with AI, now in Labs
A new Layout AI builder lets you design your own invoice layouts instead of relying on one fixed template. Describe the invoice you want in plain language and the builder generates it, or upload an existing invoice to have it rebuilt. From there, keep refining it through chat, with every AI change saved as a restore point you can go back to, or open the layout in the visual editor to adjust elements directly. Finished layouts sit in one list with search, sorting, previews and version history, and any published layout can be chosen when creating an invoice. It sits under Payments, then Invoices & Estimates, then Layouts, and needs switching on for each account first under Settings, Labs, so ask your usual contact on the Clientflow team if you cannot see it. Whatever layout you design, keep your ABN and the GST shown on it, since a valid Australian tax invoice needs both. For a business that wants its invoices to match the rest of its client-facing paperwork, this does the job without a designer. More detail
Marketing and reporting
See the dollar value behind every lead source
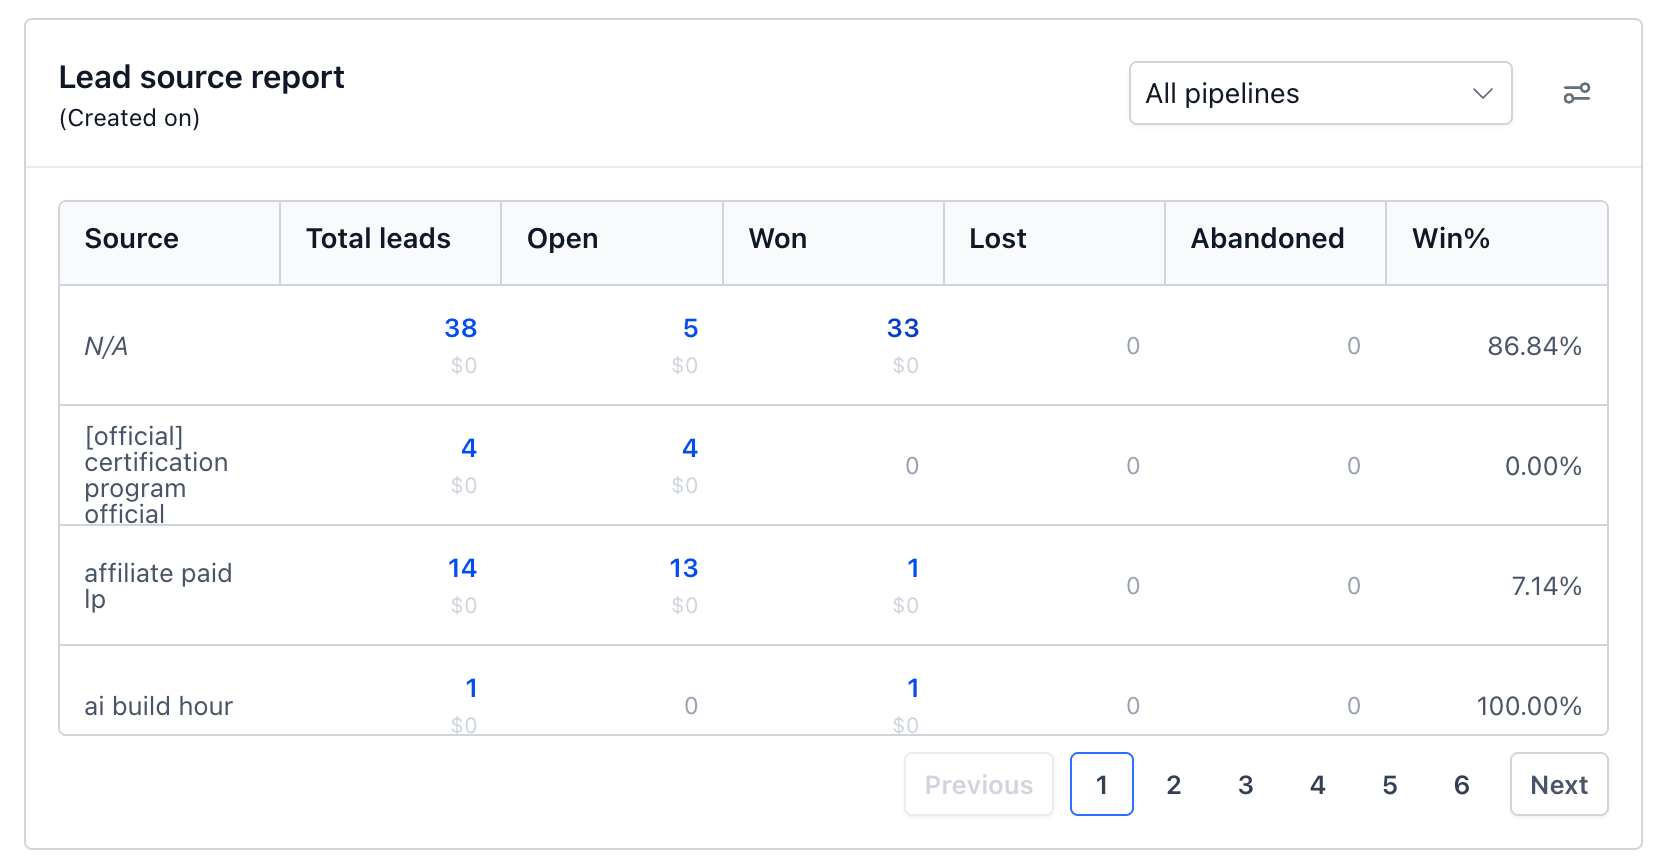
The Lead Source Report has gained more depth. Clicking any figure under Total leads, Open, Won, Lost or Abandoned now opens the exact opportunities behind that count, and every status shows its dollar value as well as the overall total, so sources can be compared stage by stage. A new filter isolates opportunities with no source attached, using Is empty or Is not empty, and any opportunity missing a source now shows as N/A instead of dropping out of the report. The table has also been tidied up, with consistent row heights and columns that stay readable on smaller screens. Lead value figures are visible only to users with permission to see them. For a property services business, it becomes much clearer which channels, whether referrals, paid ads or a website form, are turning into paying jobs rather than enquiries alone. More detail
More control over Meta campaign budgets
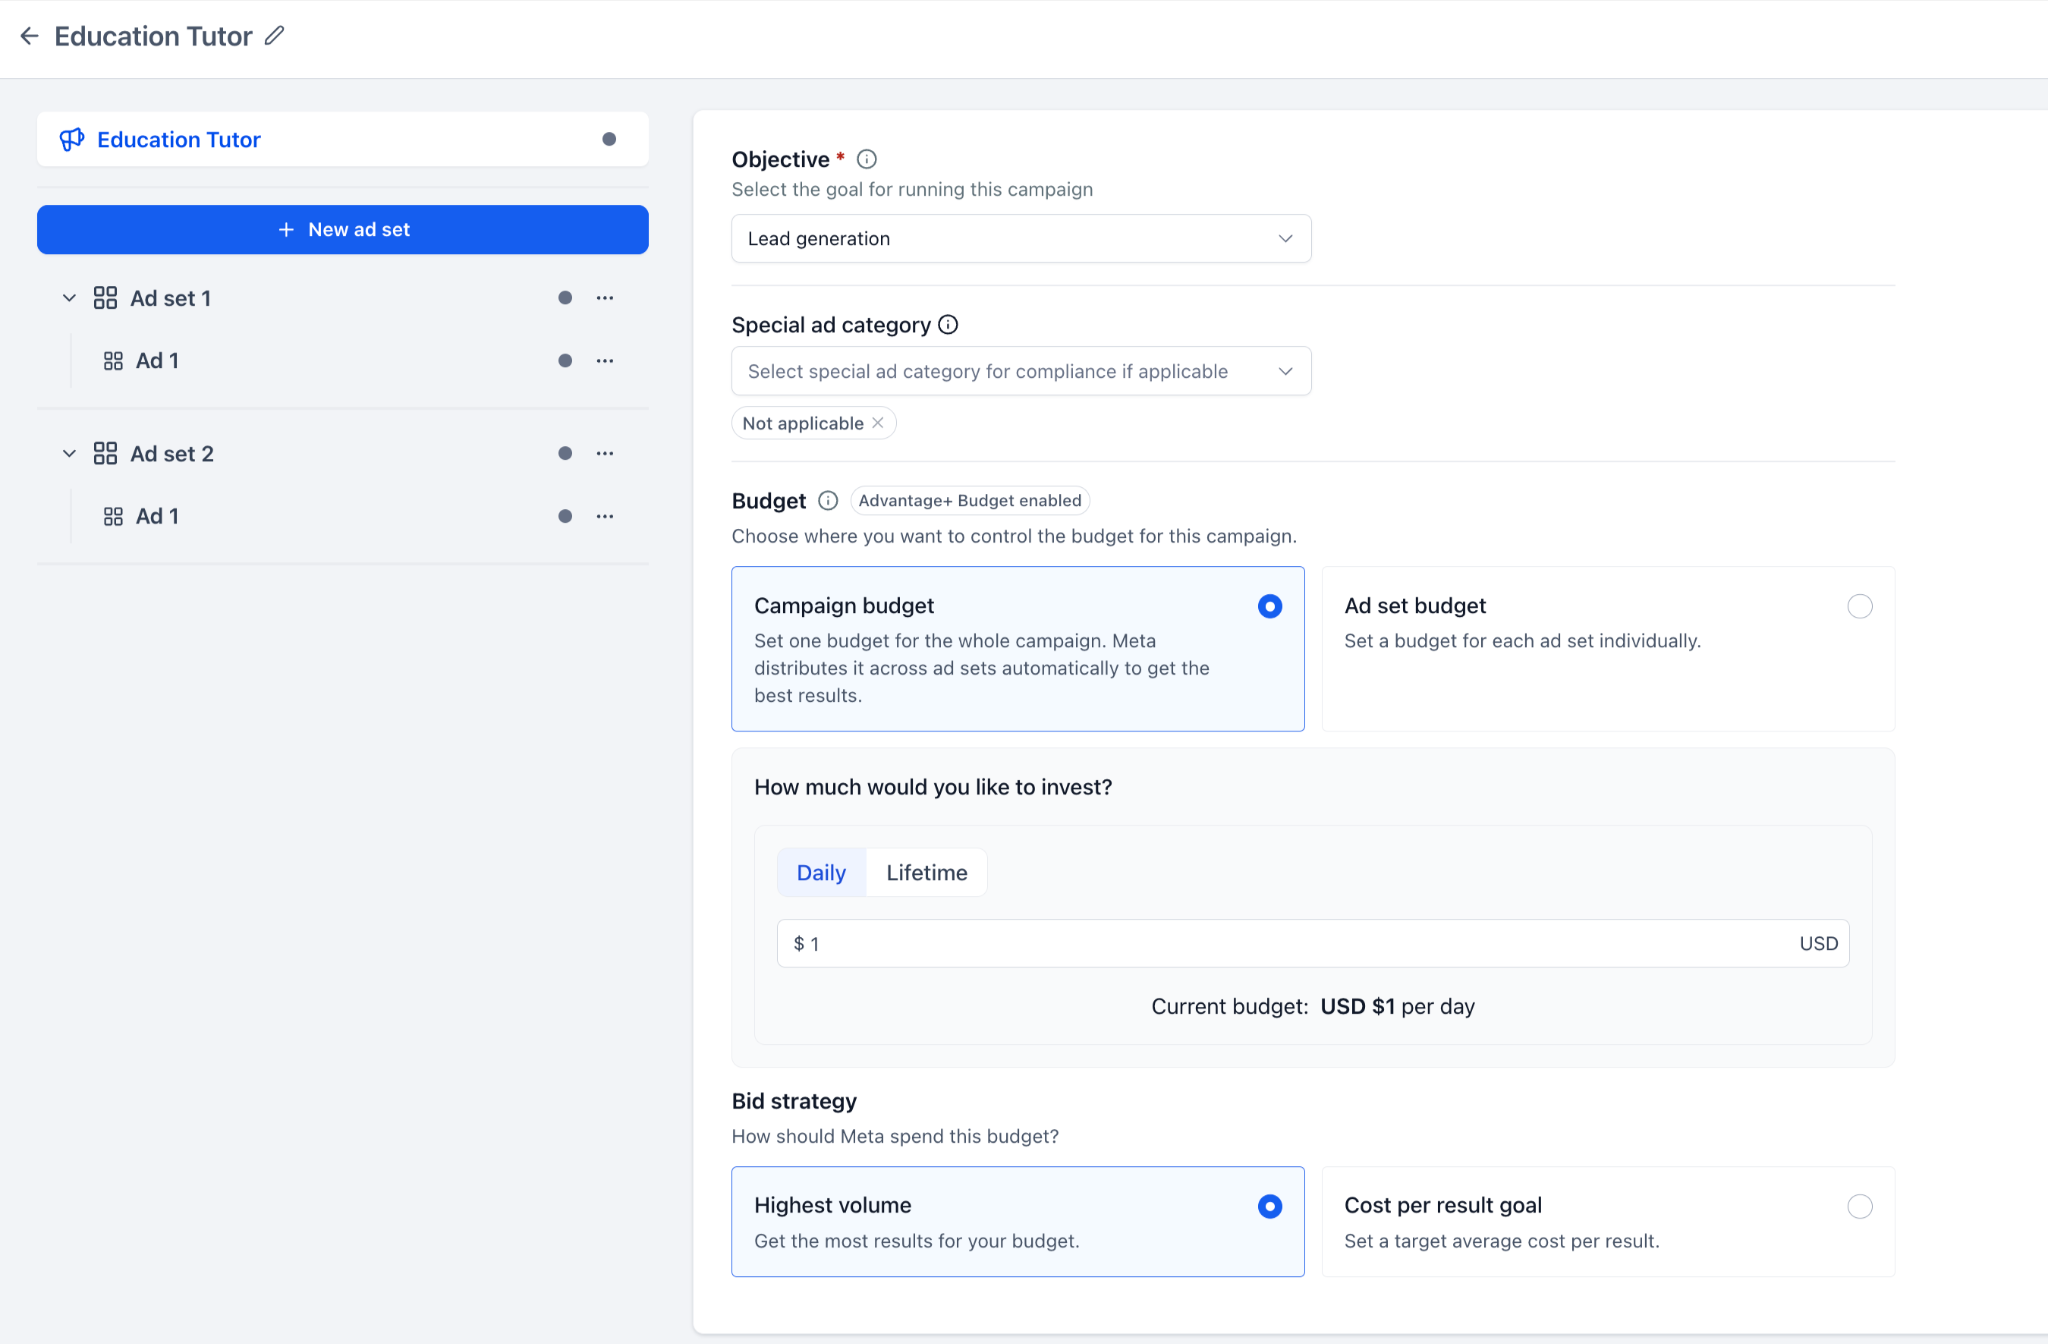
Meta campaigns built in Ad Manager now offer more control over how budget is managed. You can choose a campaign budget, where Meta spreads spend automatically across ad sets, or an ad set budget, where each ad set is funded individually, with an option to let Meta share up to 20 per cent of an ad set’s budget with other eligible ad sets based on performance. Daily and lifetime budgets are both supported, along with bid strategies such as highest volume or a cost per result goal, and the setup can be changed after a campaign goes live. You will find it in Ad Manager when creating or editing a Meta campaign. For a property services business running Meta ads for lead generation, that means finer control over where spend goes without leaving the platform. More detail
Community posts can now be scheduled through the API
Community posting in Social Planner now has public API support, so marketplace apps and custom integrations can schedule and publish Community posts and choose which Community member a post goes out as. Integrations can list eligible active members and confirm a member is still authorised before scheduling, and the platform runs one more check at publish time so a post never goes out under someone who has since lost access or left the Community. Posting to a Community from inside the platform is unchanged. This is an addition for developers, so it mainly matters if you use a connected app or integration that publishes to a Community on your behalf. More detail
SMS registration
See where each number is in SMS registration
If your account registers numbers for SMS campaigns, each number linked to a campaign now shows its registration status in real time: Pending, Registered or Failed. A number that has fully cleared carrier registration carries an A2P Verified tag on the phone numbers page, and every existing number has already been updated with its current status, so there is nothing to do. Previously the only thing visible after submitting a number was that it had been submitted, and messages sent before registration finished failed with error 30034, which usually meant raising a support request to find out why. Now you can tell the moment a number is ready to send from, spot a rejected registration and deal with it directly, and avoid that failure altogether. Registration typically completes within 24 hours, though timing depends on the carrier, so a Pending status during that window is expected. More detail
Clearer fixes when an SMS campaign registration is rejected
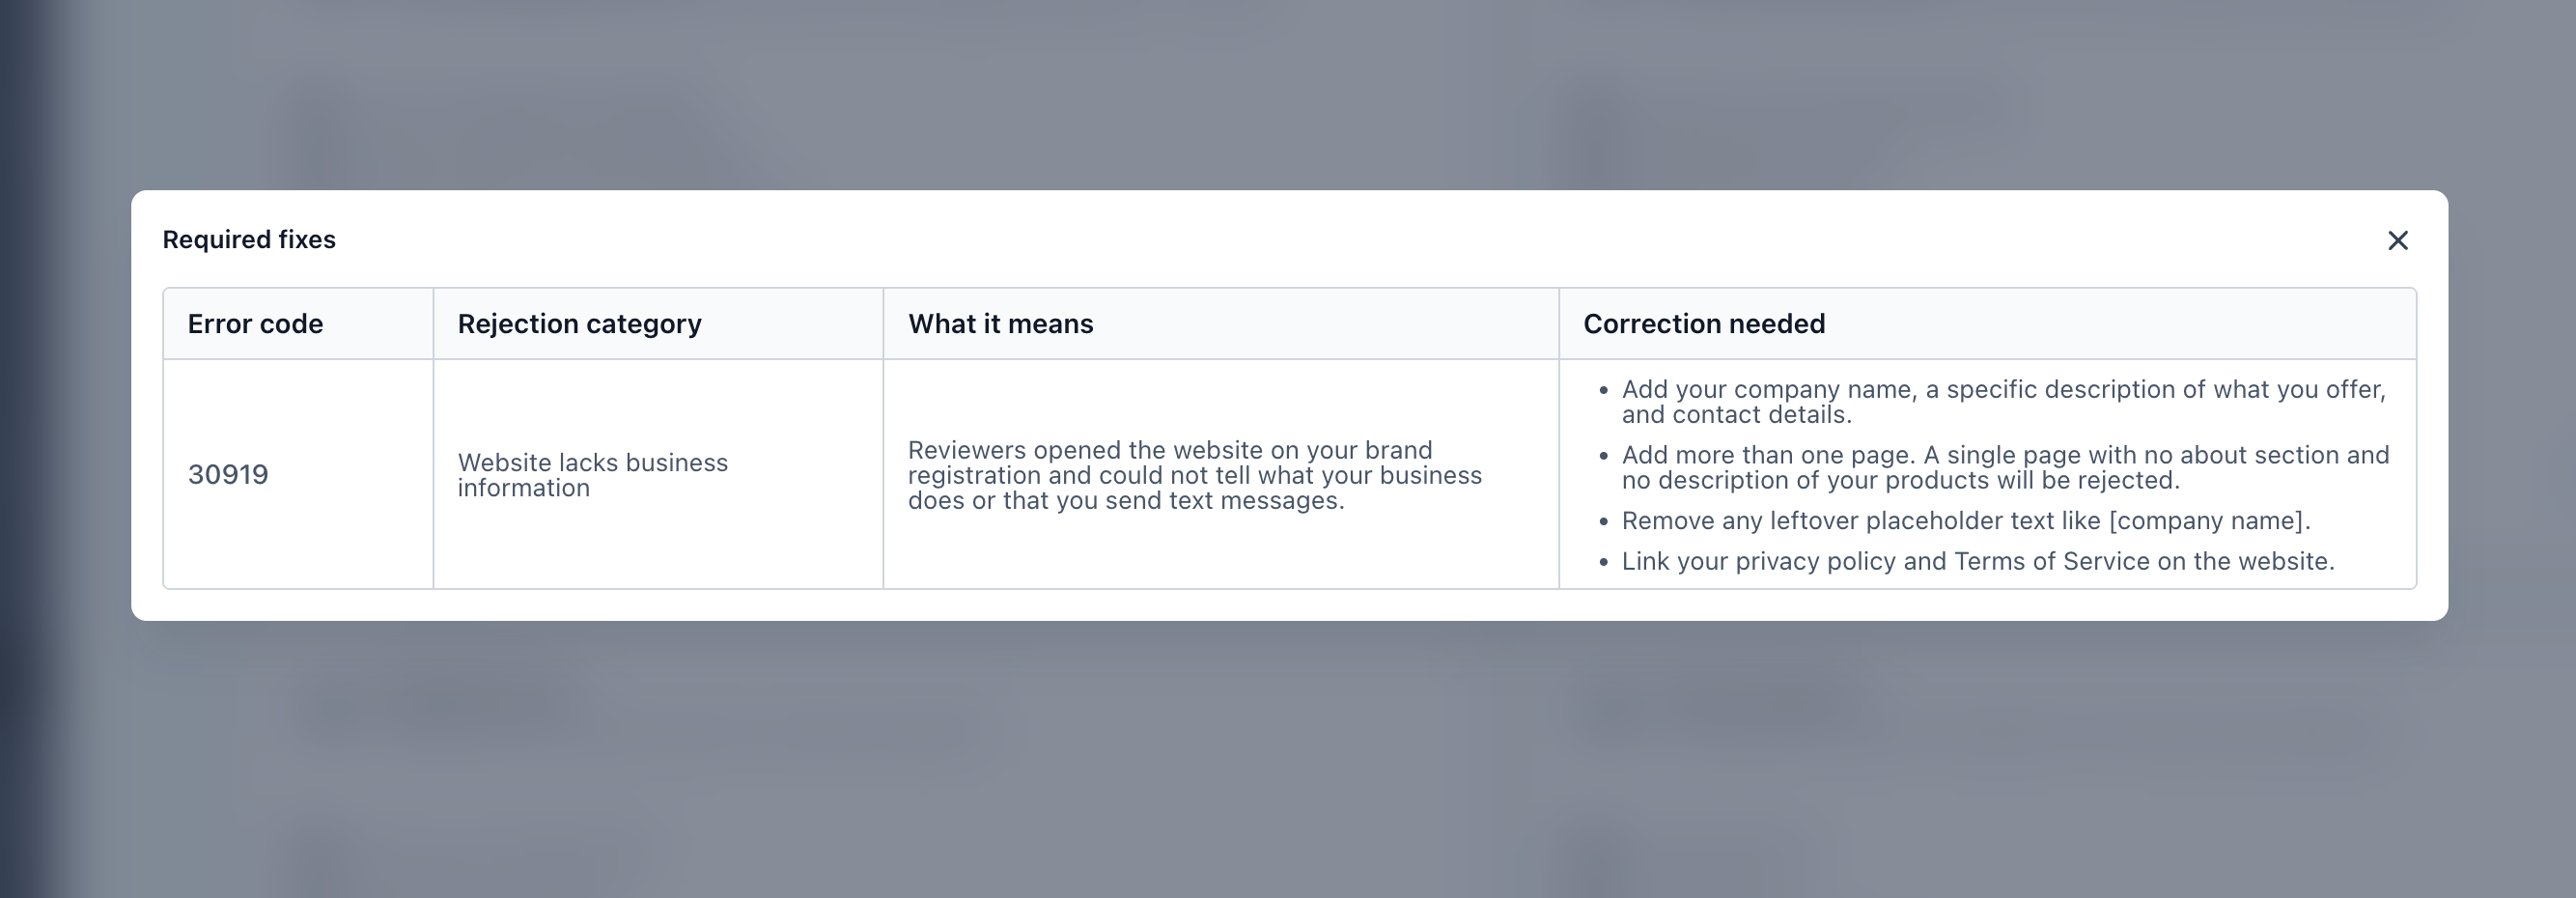
When an SMS campaign registration is rejected, the View required fixes window now gives guidance matched to how the campaign was set up. Campaigns registered through the chat widget get guidance focused on what you actually control, such as website content and policy links, rather than being told to edit consent wording the widget already generates. Campaigns set up manually get guidance specific to their configuration. The most common rejection reasons are now explained in plain language with the exact steps to take, and where carriers require specific wording, such as for privacy policy verification, the guidance includes it. Where resubmitting will not help until something else changes, such as a business type mismatch, the guidance says so up front. It is live for all accounts with no setup required. For a business relying on SMS for job updates and reminders, that should mean fewer failed resubmissions and a faster path to an approved campaign. More detail
Contacts and communities
Delete old options from company and custom object fields
Admins can now delete options from dropdown, multi-select, radio and checkbox fields on custom objects and companies, matching what contact and opportunity fields already allowed. An unused option can be deleted permanently, or an option in use can be removed from future selection while records that already carry it keep the value, so historical data and existing automations are not broken. Before deleting, you can see how many records use an option. It is under Settings, then Custom Fields, on any custom object or company field. For a business tracking jobs or properties as custom objects, outdated status options or old service categories can be cleaned up without losing past records or breaking the workflows built on them. More detail
Unsubscribing from one community email no longer stops them all
Unsubscribe links in community emails now apply only to the specific community and notification type that sent them, rather than opting a member out of every community and platform email at once. Clicking unsubscribe opens a confirmation page naming the community and notification type being switched off, and only that combination stops, while other communities and platform emails keep arriving as normal. An expired or already used unsubscribe link now shows a clear message confirming nothing changed. Members can turn any disabled notification back on from their own notification settings at any time. For a business running client communities, a member who switches off one noisy type of notification in one community will no longer miss booking confirmations or other messages they actually want. More detail
That is the fortnight. Missed the last one? Catch up on the 14-27 September updates.
Already a Clientflow client? If you want to know more about any of these features, or would like them deployed in your account, get in touch with your usual contact on the Clientflow team.
Not yet a client? Book a call with the team, or see the full feature set on the platform capabilities page.
Clientflow is built on the HighLevel platform, delivered with Australian onboarding, support and expert implementation. Read how that works on our GoHighLevel Australia page.


